Chromatic Aberration – purple fringe
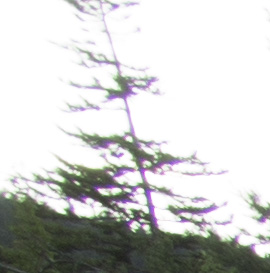
I recently had a reader that wrote in and was frustrated with the level of chromatic aberration (sometimes abbreviated as “CA”) that he was getting in his final images with Photomatix. Chromatic aberration is the color fringing that appears around the edges of objects, especially when you have a dark object surrounded by a lighter object, like the leaves of a tree against the sky. This fringe tends to be greater with less expensive lenses and with wide angle lenses. Unfortunately, the HDR process, which can enhance detail in an image, also enhances bad things like sensor noise and CA.
There is a way you can reduce, if not eliminate, CA in your final HDR image regardless of which program you choose to merge the HDR sequence. The secret is to first bring the sequence of images into Adobe Camera RAW (ACR) with Bridge, Lightroom, or Photoshop. You will want to select all the images from the HDR sequence to bring them into ACR. For example, in Lightroom, you can hold down the control key and click-select each image, or simply click on the first image and hold down the shift key and click on the last image which should highlight them all. Then go to the “Develop” tab in Lightroom.
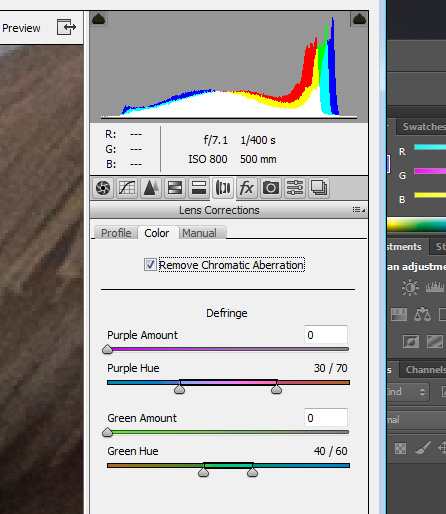
Within the ACR program, there is a tab for “lens correction”. Click on this and you will be presented with sliders under DeFringe marked “Fix Red/Cyan Fringe” and “Fix Blue/Yellow Fringe” in older versions of ACRl There is also a drop-down list, and you will want to make sure to select “all edges”. Under the newest version (I’m using 7.1), there are four slides which read “Purple Amount”, “Purple Hue”, “Green Amount” and “Green Hue”. There is also a check box for “Remove Chromatic Aberration” that should be checked. In Lightroom, these same options are under the “Lens Correction” tab in Develop mode.
Before you begin to manipulate the sliders, zoom in to a part of the first image that displays CA about 200-300%. You then want to manipulate the Fringe sliders to reduce or remove the fringing. Work carefully with each slider. In the newer version of ACR, you can adjust the lower sliders to control to adjust the range of the hue that you want to reduce. Note that these adjustments are global and effect the entire image. In the newer versions of ACR, you can use the adjustment brush to apply the adjustments locally.
When you are satisfied with the results, use the “select all” button in the upper left corner of the ACR window and while pressing the Alt key, click “Synchronize” This will apply the same setting to all the entire sequence of images that are currently in ACR.
Finally, save the images using the button in the lower left window of ACR and select a folder on your computer. Save them with the TIFF image format. If you are using Lightroom, you can just export the entire sequence, with the ACR adjustment, into your favorite HDR program after copying and pasting the RAW adjustments to each image in the sequence.
Otherwise, you can bring those TIFF images into Photomatix, or whatever program you prefer to use, and make sure to uncheck the option to reduce chromatic aberration as you have just done that step with ACR! The CA reduction in Photomatix just doesn’t work all that well yet.
This process requires a few extra steps, but I think you will be pleased with the results. You can use this same process on non-HDR images that display excessive CA as well!
]]>
Well, I was recently reading the new Lightroom 4 book from Scott Kelby and he mentioned a technique for adjusting low contrast images – so I decided to create a preset in Lightroom and give it a try. Imagine my surprise! Check the adjusted image below the original!
Big difference! Thank you Scott!
Now, this may not be as good as an image shot it better light, but it still created a much improved image that I wouldn’t mind showing. I also added two more (original and adjusted) image of just the statue by itself.
Rather than give you the adjustments, how about I just share the preset? CLICK HERE to download the preset and then import it into Lightroom presets (on the left under the Develop setting). I named it SK-Contrast as a tribute to Scott Kelby!
NOTE – click on the images for larger views!


]]>
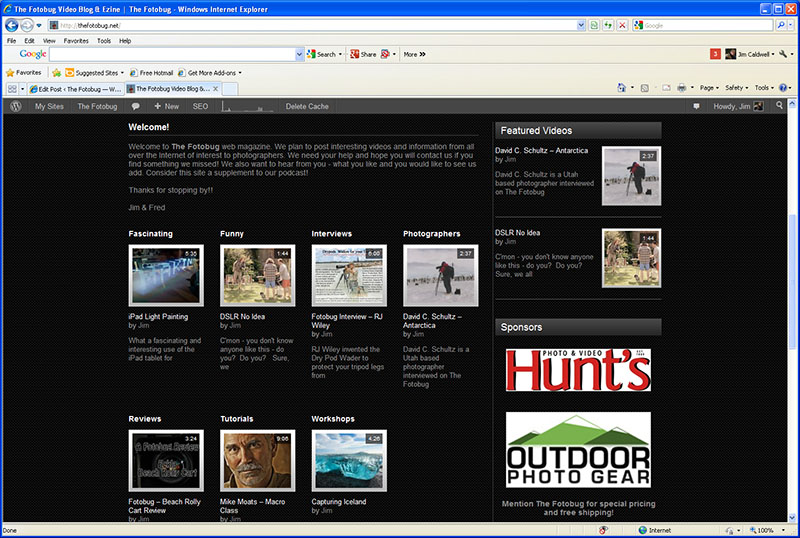
In order to get the most out of this site, I’m going to do a quick walk-through and quickly point out the features. We welcome your comments and suggestions and if you find some interesting photography related videos to share, let us know!
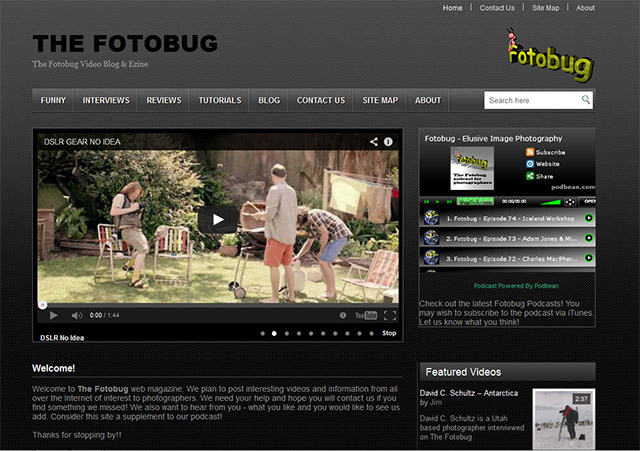
The first thing you are likely to notice is the video slider that features the most recent videos we have added. It will present a screen and brief title of the last 10 videos added, and you may stop it at any point and click on a video to view it. In most cases you should also be able to click on the lower right of the video to watch it full screen.
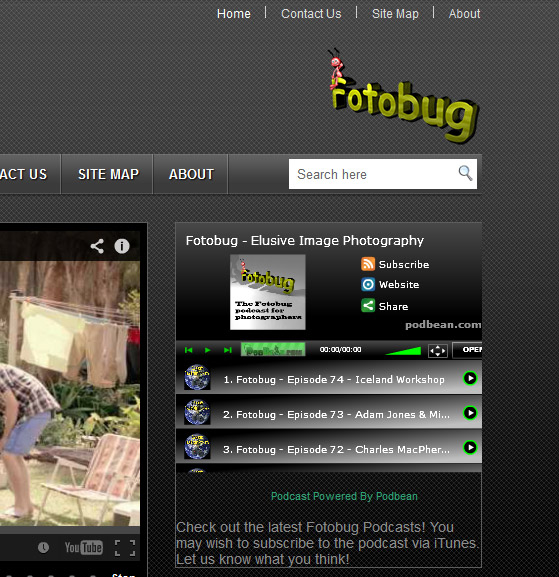
To the right of the video content slider is a widget that displays a list of all The Fotobug podcasts. The most recent is on top followed in order down to the very first podcast. You can watch the podcasts here, but we encourage you to subscribe via iTunes or your favorite RSS feed for a better viewing experience.
Fotobug podcast link
Above the video content slider is a list of links to some of the popular video categories as well as links to our blog, our site map and the About page. In the upper right of each page are links to additional pages such as a Contact Us page and links to pages about the co-hosts, Jim and Fred.
Fotobug video categories
Directly below the Video content slider are thumbnails and links to the latest video in each video category. These categories include videos from photographers who have appeared on The Fotobug podcast, workshop videos, tutorials, reviews, etc. Click on the headings to see all videos in each category!
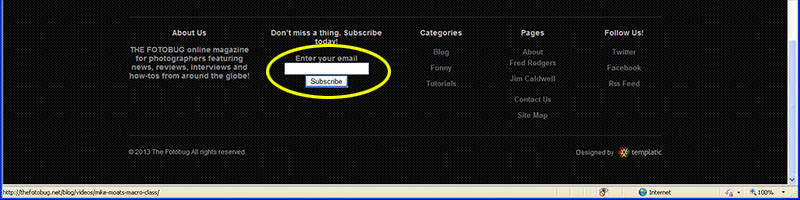
Fotobug Footer
In the footer of each page are also links to popular pages and categories as well as social media links. However, the most important item in the footer, is circled in yellow above. Simply enter your email into this text box and click on ‘Subscribe’ and once a week, you will receive an email summary of new content that was added to the site! No spam, we promise!
Below each video on the video detail page and following each blog posting is a comment box. We encourage you to leave comments! In addition to the usual social media buttons (Facebook, Google+, Pinterest, etc.) there is a star rating system. After watch the video, please click on the star that represents your opinion of the video, from 1 to 5 stars (5 being the best, of course!). These comments and ratings help us to determine what is popular and what our listener/viewers want to see.
Last (but not least!), there is a link at the upper right of each page to Contact Us. Please don’t hesitate to use this to send us private feedback, complaints, suggestions, or whatever. We want this website to be a valuable resource and we need your help to make sure we reach that goal!
Thanks for taking this quick tour with me and don’t forget to leave any comments or questions below!
]]>